How to Apply Sno-Seal for Maximum Waterproofing

If you’ve read our guide to boot care and waterproofing methods, you already know why a solid wax like beeswax outperforms oils, greases, and animal fats for long-term leather waterproofing — it stays fixed in the outer layer of the leather instead of migrating through it over time. This page covers the right way to apply Sno-Seal for the most effective waterproofing.

The Basic Method

  1. Preheat clean, dry boots or shoes using a heat lamp, sunny window, or hair dryer — don’t exceed a comfortable handling temperature (around 120°F). You should be able to touch the leather without discomfort.
  2. Rub the wax into the leather liberally. The warmth melts it on contact and draws it into the pores and fibers rather than leaving it sitting on the surface.
  3. Apply as much as the leather will absorb. Keep going until the leather stops visibly taking it in.
  4. Remove excess with a rag, and buff with a brush if you want a shine. Regular shoe polish can go directly over the wax if you want to maintain color and gloss on dress shoes.

Why the Order of Operations Matters

There’s a detail in that process that’s easy to skip past but actually explains why some people get inconsistent results: applying wax to leather and then heating it is not the same as applying wax to leather that’s already warm.

The wax itself has a fairly high melt point after it’s applied — hot enough that it stays solid and fixed in place even on a hot day, which is exactly why it doesn’t need constant reapplication. To make it workable during application, it’s blended with a solvent that temporarily lowers the melt point so it can be worked into the leather; the solvent then evaporates away completely, leaving just the wax behind. (This is also why a jar left open in storage can harden over time — the same evaporation happens slowly in the container if it’s not sealed.)

Solvent evaporates toward a heat source. If you apply wax to room-temperature leather and then heat it, most of the solvent evaporates upward toward the hair dryer or lamp — pulling it away from the leather and leaving the wax sitting mostly on the surface rather than absorbed into it. If the leather is already warm when the wax goes on, the solvent evaporates into the leather instead, carrying the wax with it deeper into the fibers. Same wax, same heat source, meaningfully different result depending on which order you do it in.

A Practical Routine for Multiple Pairs

If you’re treating several pairs at once, working in rotation makes efficient use of the preheating step:

  1. Preheat all pairs at once — a sunny window, wood stove, heat lamp, low oven (around 125°F), or central heat vents all work.
  2. Apply wax to the first pair, then move to the next while it absorbs, and the next, working down the line.
  3. By the time you circle back to the first pair, it should look dull — a sign the leather has absorbed what you applied.
  4. Add more wax to any pair with dull spots; continue the rotation.
  5. When a pair stays visibly shiny for a few minutes after application, the leather has reached its saturation point. A small amount of surface excess left at this stage actually helps with abrasion resistance from grass and snow — you don’t need to chase a completely matte finish unless you want one.
  6. If you prefer a more finished look, buff the excess off with a towel once you’re done.

Important Cautions

  • It will darken leather. This is a visible, permanent cosmetic change, not just a temporary wet-look — factor that in before treating a pair where original color matters.
  • Not recommended for suede. It will darken and flatten the nap, changing the texture and appearance, though it will still waterproof and preserve the leather underneath if that trade-off is acceptable to you.
  • Keep out of reach of children, as with any wax/solvent product.

Beyond Boots

The same wax works on other water-exposed materials where a natural, low-sheen finish is preferred over a hard lacquer — exposed wood trim (like teak on a boat), sealing screw holes in treated outdoor lumber before driving screws in, and leather components on ice skate boots. It’s also used to help maintain proper moisture balance in horses’ hooves.

For skin care specifically, use a product actually formulated for that purpose rather than a leather/wood wax — Pro-Tech-Skin is Atsko’s food-grade option for protecting hardworking hands and skin.

Related Reading

Boot Care 101: Drying, Waterproofing, and Choosing the Right Treatment

Most boot advice covers fit and break-in. Almost nobody covers what happens after that — the maintenance that actually determines whether a good pair of boots lasts five seasons or fifteen. Two things ruin leather boots faster than anything else: drying them wrong, and waterproofing them wrong. Both are avoidable.

Rule One: Dry Them Slowly

When leather gets soaked — rain, wet grass, stepping in over the boot top — the instinct is to speed-dry them by a heater or in front of a fire. That’s the single fastest way to ruin a pair of boots. Heat forces moisture out of leather too quickly, and the leather responds by hardening and shrinking. A few cycles of that and the boots are done.

The right approach is slower and less satisfying: low or no heat, with enough airflow to dry a fully soaked boot over about two days. A boot that’s only partially wet can usually dry in a day. If you’re regularly soaking boots — hunting, fishing, working outdoors — the practical fix isn’t faster drying, it’s rotating between two or three pairs so nothing goes back into wet boots the next morning. In cold climates, this isn’t just about the boots — wet boots and cold feet are a real safety issue, not just a comfort one.

A Gore-Tex® liner doesn’t change this. The liner keeps liquid water away from your foot, but it does nothing to protect the outer leather from soaking up water and abuse — that’s still on you to manage with proper drying and waterproofing.

Rule Two: Understand What Waterproofing Actually Does

Before comparing products, it helps to know there are really only two ways a treatment keeps water out of leather:

  1. Filling the pores. Something water-incompatible occupies the spaces in the leather so water has nowhere to go. This is the oldest method — beeswax, animal fats, mineral oil, and pine tar all work this way, and have for centuries.
  2. Reducing surface tension. The treatment doesn’t fill space so much as change how water behaves on the surface, causing it to bead and roll off rather than soak in. Silicone and fluoropolymer treatments primarily work this way.

Which mechanism you want depends heavily on whether the treatment stays solid or stays liquid after it’s applied — and that distinction matters more than most boot buyers realize.

Comparing Waterproofing Methods

MethodHow It WorksStrengthsTrade-offs
BeeswaxFills pores; stays solid at normal temperaturesMaximum durability and water resistance; stays fixed in the outer leather rather than migrating through it; doesn’t need frequent reapplicationDarkens and adds slight sheen to leather; not ideal where a lighter, drier finish is wanted
Oils, greases, animal fatsFill pores, but remain liquid/soft at normal temperaturesEasy to apply, traditionalMigrate through the leather over time rather than staying on the surface; require frequent reapplication; can eventually soften and weaken the leather, and animal-based fats can turn rancid and promote fungal growth
SiliconeFills pores somewhat, plus reduces surface tensionEasy application; works well on suede, split, or sanded leather where wax would darken the appearance too muchLess durable and less water-resistant than wax; aqueous (water-based) silicone formulas underperform solvent-based ones significantly
FluoropolymerReduces surface tension strongly (best stain/oil resistance)Excellent for stain and oil resistance on textilesRequires a very clean surface and factory-level heat (around 300°F) for full effectiveness — hard to replicate at home on boots; generally weaker at pure water repellency than wax or silicone

Why the solid-vs-liquid distinction matters so much: any liquid treatment — oil, grease, animal fat, or a non-solidifying wax blend — doesn’t stay where you put it. It migrates through the leather over time. Eventually it soaks all the way through, shows up on your socks, and leaves the leather soft, spongy, and unable to absorb foot perspiration the way it should — which means cold, clammy feet regardless of how “waterproof” the boot technically still is. A treatment that solidifies (like beeswax) stays fixed in the outer layer instead, leaving the rest of the leather’s thickness open for insulation and moisture absorption.

Prepping a Boot Before Waterproofing

  1. Clean and dry the boot first. Scrub heavy dirt off with a wet brush; wipe light residue with a cloth dampened in water or solvent. Solvent evaporates faster, so you don’t have to wait as long before applying treatment.
  2. Remove factory shine coatings if switching to wax. New boots often carry a temporary glycerin or carnauba wax coating for shelf shine. Since these are water-soluble, wash the boot with a residue-free detergent or mild dish soap and let it dry completely before applying a real waterproofing treatment — otherwise the new treatment is bonding to a coating, not the leather.
  3. Match the treatment to the leather type. Smooth, full-grain leather takes wax well once any factory coating is removed. Split, suede, sanded, or recycled leather can also be waterproofed with wax, but expect it to darken and take on a slicker look — a trade-off worth knowing before you commit, especially if the boot’s appearance matters as much as its performance.

A Word on Emulsified/Water-Based Products

Some products are marketed as easier because they can be applied to already-wet leather — appealing when you didn’t prep ahead and your boots are already soaked. In practice, these emulsified wax or silicone formulas tend to underperform their solvent-based counterparts. Making wax or silicone mix with water requires a surfactant, and that same surfactant residue makes it easier for water to get back in later — which undercuts the entire point of waterproofing the boot in the first place.

How Atsko Products Help

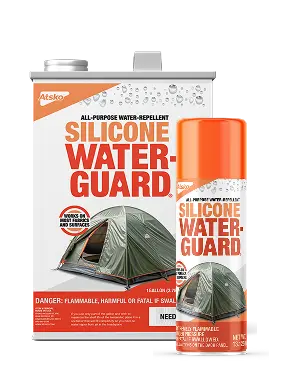
Sno-Seal, Atsko’s original beeswax waterproofing, is built around the solid-wax approach this page describes — it stays fixed in the outer leather rather than migrating through it, which is why it doesn’t need constant reapplication the way oil- or grease-based treatments do. For split, suede, or leather/fabric combination boots where a heavy-duty repellent matters more than appearance, Silicone Water-Guard is a solvent-based option built to the same durability standard rather than a weaker water-based alternative.

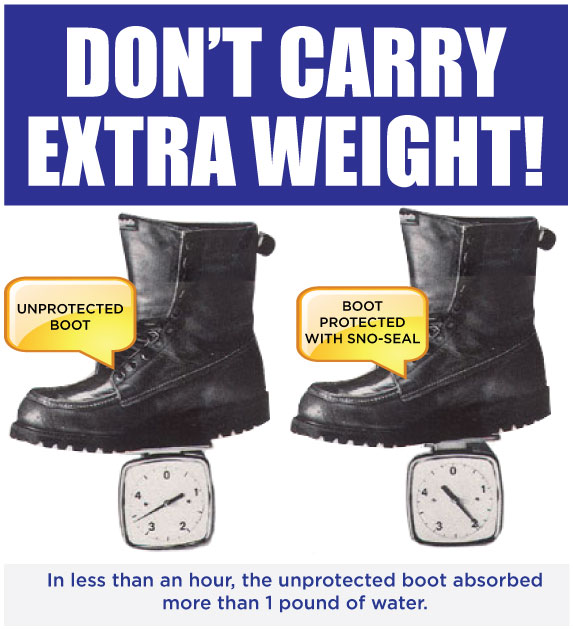
Don’t Carry Extra Weight

If your boots are wet, you’re lifting an extra three pounds with every step you take.

Ad for Sno-Seal boot protector

Learn the importance of dry comfortable footwear. Unprotected leather absorbs and retains water. Not only does this make your feet feel cold and wet but water increases the weight of you boots which makes walking tiring. Even GORE-TEX® lined boots need protection. GORE-TEX® keeps your feet dry but the leather and liners soak up water making the boot heavy and pulling heat away from your feet. Your feet are cold and feel wet. When each boot is only 1 lb. heavier you will lift an extra 2212 lbs. to walk one mile. That’s tiring.

WATERPROOF YOUR BOOTS WITH SNO-SEAL® AND BE LIGHT, WARM, AND DRY.

Repair-All by Sno-Seal

Repair-All by Sno-Seal is a unique product. Three special properties make it superior for sealing welts, seams, and stitching of footwear and repairing and patching waders tents and rubber boats. First, its ability to remain flexible, second its ability to fail cohesively rather than adhesively, and finally its ability to re-soften and adhere to previous applications of itself.

How it works:
When applied to clean materials the solvents in Repair-All attack the surface and actually bond into it. This bond (adhesion) is stronger than the Repair-All is itself (cohesion). This means that when Repair-All bonds two pieces of material together, the bond to each material is stronger and will remain intact after the bead of Repair-All has failed and split. This is important because if the bond failed the material being repaired would be damaged making further repair impossible. If a Repair-All repair fails, you simply apply a fresh bead directly on the old repair. The solvent in the new material re-softens and rejoins the old material (which is still bonded) and your repair is once again complete.

Repair-All can protect welts, stitching and seams from other damage too. Welders often burn the stitching of boots, gloves, and aprons with weld splatter or contact to hot surfaces. This causes even brand new protective gear to “fall apart”. A bead of Repair-All on exposed stitching will prevent this damage. The stitching can not be damaged until the Repair-All has first been burned. Frequent inspections and touch-up of the protective Repair-All will eliminate this kind of damage to boots and other protective gear worn by welders.

Repair-All forms butterscotch colored seal of nitrile rubber adhesive. It cures in 12-48 hours and remains flexible. Repair-All is excellent for repair of rainwear, waders, wetsuits, rubber boots. It resists weather, water, chlorine, oil, gas, diesel, blood and most cleaners and solvents except acetone and M.E.K. Repair-All will repair most vinyl, rubber and plastic toys and sporting goods including pool equipment, covers, and accessories.

Shelf life is at least three years in the recyclable aluminum tube. Excessive heat (over 100 degrees) during storage may expand Repair-All forcing the tube to leak. For maximum life, store between 60 degrees and 80 degrees and squeeze air from tube (tip up) before capping tightly.

Miners of coal and other minerals, persons who work concrete, and sand blasters experience early failure of stitching because of damage caused by abrasive particles. This can be prevented by a thin coating of Repair-All applied on the stitching and seams, sealing out even the smallest particles.

There are numerous non-footwear applications for Repair-All. Cracks, seams, holes, and wear spots on rubber, plastic and canvas items can be repaired easily with Repair-All. Rain wear, waders, tents, boats, door and window hardware and other items often require a strong flexible bond. The Repair-All tube is an excellent way to apply a flexible contact adhesive to a small or delicate repair. Rigid materials may also need a flexible adhesive if they have different expansion rates and are exposed to temperature variations.

Warning:
Repair-All contains acetone solvent. Always test first to be sure it will not destroy the material you wish to repair. To speed drying and cure, a joint can be coated, pressed closed, and then opened for a minute of air dry before final assembly. Always use adequate ventilation. Avoid contact with Repair-All. Abuse of solvent vapor can result in death. (Repair-All contains non-photo-chemically reactive solvent, southern California APCD rule (1-9-76).

Directions
For best adhesion, surface must be clean dry and free of dust or wax. If the shoe will be treated with Sno-Seal, Repair-All should be applied first because it is difficult to remove Sno-Seal from leather. Sno-Seal can be cleaned easily from an existing bead of Welt-Seal with mild solvent when reapplication of Repair-All is needed. Temperature of Repair-All and surfaces should be between 65° and 80°F.

Application
Apply a thin layer, flowing Repair-All by gravity over all the areas to be covered. It can be spread with disposable or easy to clean tools but tends to form strings until skinned over. Do not “pump” tube as this will create bubbles of trapped air. Excessive thickness or heat while curing will also create bubbles. Small bubbles will not reduce the effectiveness of Repair-All.

Very absorbent materials may require more than one coat. Two thin coats is always preferred to one thick coat and will reduce running. Treat one side of a boot and set it down to skin over while you treat one side of the other boot. In less than one minute, Repair-All will skin over and you can treat the other side of the first boot.

Thank you for choosing Repair-All. Please consider our other Sno-Seal products. All are designed to make your footwear, clothing, and gear work better and last longer. Our efficient and economical products help you conserve and enjoy our world.

Danger: Extremely Flammable
The vapors of this product are easily ignited. Contains acetone. Precautions; keep product and its vapors away from heat, sparks and open flame. Use only in areas adequately ventilated with enough air movement to remove vapors and prevent vapor build-up. Avoid prolonged breathing of vapor. Avoid eye contact. Avoid prolonged or repeated contact with skin. Keep container closed when not in use. Keep out of reach of children. Suggested first aid: immediately flush eyes with water for 10 minutes and call a physician.

Proper Care of Hardworking Leather

Sno-Seal provides maximum waterproofness and durability for smooth full-grain leather footwear. Oil or chrome tanned leather accepts Sno-Seal readily after removal of any factory coating. (Glycerin or Carnuba, wax which are water-soluble, is often applied for a temporary shine and scuff resistance). A new boot should be washed with a soft brush using Sport-Wash or a mild liquid dish washing soap, and allowed to dry completely before applying Sno-Seal.

Sno-Seal also protects split, sanded, suede, rough and recycled leather. These materials need the protection of Sno-Seal for rugged use, but application of Sno-Seal will change their appearance. As Sno-Seal coats the exposed fibers and fill surface gaps, these non-top grain materials become darker and slicker.

Sno-Seal can also be used on silicone treated leather when the silicone is scuffed and worn off and no longer works. Spray or dauber application of ATSKO’s Silicon Water Guard. is quick, easy, and superior to any other silicone, but no silicone can provide the durable waterproofness of Sno-Seal. When silicone treated boots can no longer resist water, simply scrub the remaining silicone out of the leather with Sport-Wash, saddle soap or dish detergent. Then, slowly dry them for a couple of days and apply Sno-Seal according to directions.

Gore-Tex® fabric lined boots should be protected with Sno-Seal the same as you would treat them if Gore-Tex® was not present. Sno-Seal does not effect Gore-Tex® and Gore-Tex® does nothing to protect the outer boot form water and other abuse. To benefit from the breathability of the Gore-Tex® liners, the inside of the leather must be dry and free of oil, grease, or animal fat so that it can absorb perspiration from the foot. At night this moisture will evaporate thru the Gore-Tex® and pass out of the boot leaving it dry and comfortable for the next day’s use. The Gore-Tex® line will hold water away from your foot, but Sno-Seal will keep your boot warmer and lighter by preventing water from being absorbed by the outer layer of the boot or leaking into the space between the leather and the liner. When the leather is wet it can add 1 1/2 pounds to a boot.

Why is Sno-Seal so good?
The superiority of Sno-Seal results from the combination of its ability to remain fixed in the outer layer of the leather and the superior water resistance of beeswax. Beeswax has a melt point of about 146º F. It is very dry and oil free. Thus once applied it is not only waterproof but extremely durable.

Sno-Seal provides just enough lubrication to prevent hardening of leather in typical use. It does not soften leather. It was invented in 1933 by Ome Daiber to waterproof leather mountain climbing and downhill ski boots without destroying the stiffness required to climb or steer a ski. Boots, gloves, holsters etc. will maintain their strength for years if treated only with Sno-Seal. A baseball mitt can be softened with a light application of mineral oil. When exactly the right ball pocket and fit have been achieved, applying Sno-Seal will maintain exactly the same form for the life of the glove.

Grease, oil, animal fat, and most other wax formulas are liquid (or at least soft enough to migrate thru leather) at wearing and storage temperatures. Sno-Seal is not. After application, when the volatile components have done their task of drawing Sno-Seal into the warmed leather, they evaporate completely leaving solid wax that cannot migrate at less than 146° F.

Similar methods of waterproofing
Grease, animal fat and oil, including some brands of silicone oil, soak away from the surface and penetrate through the leather. They require frequent re-applications to maintain effective concentration on the surface. After a time the heel counters and box toes soften. The leather becomes soft and spongy then the product begins to appear on your socks indicating it has soaked all thru the leather. Animal fats become rancid, decaying leather and promoting fungal growth until one day the leather is so rotten the eyelets pull out when you lace up your boots. Saturated leather cannot absorb perspiration and loses its insulation value so your foot feels clammy and cold. With Sno-Seal, the beeswax stays where you need it, in the outer surface of the leather. The balance of the thickness remains open and dry for insulation and the absorption of foot moisture. By resisting migration Sno-Seal assures that there will be no weakening of thermal or adhesive bonds, a common problem with silicones and other liquids.

Who can you trust when choosing a waterproofing product?
For obvious reasons, many Boot marketers recommend a waterproofing product with their name on it, even if something else is better. Perhaps the surest way to get the right product for a boot is to find a Boot manufacturer that provides a sample of a waterproofing product (one they don’t make themselves) in each pair of new boots. Boot manufacturers experience a dramatic reduction in warrantee claims when they encourage customers to properly care for leather boots by providing a compatible product. From L.L. Bean to Sorel, more new boots, around the world, include a sample of Sno-Seal than of any other brand.

Other uses of Sno-Seal include gloves, oiled canvas coats, chaps, belts, hats, and any other wearable leather that is exposed to water. Topsiders and other leather footwear and gloves can easily last 4 times as long in severe salt water use if protected with Sno-Seal.

Industrial environments including acid, alkaline, blood, and abrasives can shorten the life of shoes, boots, gloves, aprons etc. These leather items will last longer, clean up easier, and provide better protection if maintained with Sno-Seal.

Wood can be wax finished with Sno-Seal for a durable “unfinished” look. Sno-Seal can be applied over an oil stain for a satin finish that resists water damage.

Equestrians recognize the value of Sno-Seal for harnesses, saddles, scabbards and all leather protection. Sno-Seal will make an old horse blanket absolutely waterproof. Farriers apply Sno-Seal to hoofs to prevent softening from excess moisture and also to prevent brittleness and splitting from excessive dryness.

For over 60 years customers have been telling us about their great results using Sno-Seal to protect severely dry abused skin, hands, feet, knees, elbows, lips, etc. A new formulation of Sno-Seal has been created for these applications. Pro-Tech-Skin,, a similar beeswax formula, is now available for application to the skin. Pro-Tech-Skin, has already proven itself effective for psoriasis, diaper rash, and dry and cracking skin and cuticles associated with frequent washing, dry cold weather, and advancing age. By sealing in natural moisture Pro-Tech-Skin, allows your skin to heal itself.

Silicones offer easy application but less water resistance and protection than Sno-Seal.
Silicones resist water 2 different ways. The first is similar to wax, oil, animal fat, and grease: it simply occupies space in the leather so that water can’t occupy the same space. This is of limited value compared to Sno-Seal and other wax products that occupy space better, more permanently and with less migration. The second method is by reducing surface tension so that water beads up and does not “wet” it. This is similar to the function of Fluoropolymers but Fluoropolymers – when successful – reduce surface tension further so that even oil and some solvents can’t “wet” it. (This is why Fluoropolymer is superior for stain resistance.)

Silicones are usually in solvent systems for water repellent products because water systems (aqueous emulsions of silicone) can’t match the performance of the solvent systems. A variety of solvents will work but there are advantages and disadvantages with each.

ATSKO Inc. makes a Heavy Duty catalyzed silicone product called Silicon Water Guard
The only silicone product to score 100 on the ASTM D1913 water spray test. We use a premium solvent that has a higher flash point, (less dangerous because it will not flash until it reaches a much higher temperature), lower odor and the most environmental acceptance of any in its category. This solvent requires more drying time but we believe that our customers would make the same choice if given the facts. Because we use a high concentration of top quality catalyzed silicone (a resin that cross-links for maximum durability), Water-Guard delivers effective repellence with a single application saving the time, cost, and solvent of a second application. Silicon Water Guard comes in an all steel can that can be recycled. Steel is the most recycled material in the world. Our Aerosol propellants is harmless C02. It is collected as a byproduct of other processes and only two grams Of C02 are necessary to empty a 12 ounce can. Many of our competitors use over 2 1/2 ounces of explosive Propane-Isobutane gas as propellant. Using fuel as a propellant does not improve their products but it is very heavy, very cheap, and is included in their statement of net weight.

Fluoropolymers are designed and intended for use on textiles for stain protection. They require an absolutely clean surface for adherence and 300° F heat is used at the mill to orient the molecules for maximum effectiveness. Applied under perfect conditions they work well and last for many washings if washed only in Sport-Wash residue free detergent.

Fluoropolymers are generally superior for oil and stain repellency but generally inferior to silicone and waxes for water repellency. Factory applied Fluoropolymer treatments on textiles can be restored to full effectiveness by washing with Sport-Wash to remove residue and then Ironing on Steam setting.

Fluoropolymers can give inconsistent results depending greatly upon what surface they are applied to. Baking at 300° F as in textile mill applications is impossible for boots and it is also difficult to keep boots clean enough for maximum repellency. In any case Fluoropolymers are better left for applications where Appearance is more important than Long Term Heavy Duty Waterproofness.

What is the bottom line for boot protection?
When appearance is more important than waterproofness, especially on light suede, consider Fluoropolymers like Scotchguard or Teflons. On cloth shoes you can use our water based Permanent Water-Guard. Use Silicon Water Guard for silicone tanned, and rough finished leather. Use Sno-Seal for oil and chrome tanned full grain leather. Sno-Seal has been the most effective, longest lasting, and best protection for hard working leather since 1933. Sno-Seal the original Beeswax Waterproofing is still the best today. Sno-Seal is now available in Black and Brown.

Leather Care for Ice Skates

The comfort of real leather will never be matched because of its combination of strength, support, breathability, absorbency, elasticity, warmth, and feel. Proper care will maintain these features and extend the useful life of the skate. The upper or shoe must provide correct support to maximize performance and reduce injuries. Water proofing products like grease, oil, and animal fat soak through and weaken the leather, reducing control and the support needed for maximum performance. As a skating shoe is softened by conventional waterproofing it changes in feel and response. Skating technique must be modified to overcome the weakness of the deteriorating shoe. This slows learning and destroys consistency.

Sno-Seal®, the original beeswax waterproofing, was invented in 1933 to protect ski boots and ice skates without softening or weakening them. It maintains the strength and shape of the boot for consistent edge control and the ability to transfer weight fore and aft. It has just enough solvent to allow easy application but this evaporates as it dries to a solid wax. Sno-Seal® remains in the outer surface of the leather, where it is needed to keep the shoe dry. It preserves the life of the leather and lasts a lot longer than liquid products because it stays put.

Always dry blades, blade supports, soles, and uppers immediately after skating. Interior drying does not begin until the skate reaches room temperature and is greatly delayed if ice and water left on the outside cool the inside to below room temp. Skates should not be stored in a closed container until completely dry. The entire process takes a lot longer if any water penetrates the leather from the outside so waterproofing is very important. Sno-Seal® is all wax so it is compatible with shoe polish. Sno-Seal® should be applied first, and any excess buffed off before applying a polish for appearance.

Sno-Seal®, the original beeswax waterproofing, cannot migrate through the leather. It remains concentrated in the outer surface of the leather and does not wick in. The inside of the leather remains open and porous enabling it to breathe freely, removing excess moisture from the foot. This provides hours of comfort during skating and when the skate is removed any remaining moisture evaporates so the skate will soon be ready for another session.

Sno-Seal® is also critical on the bottom or sole of the skate. Custom skate builders apply Sno-Seal® in the screw holes and between the blade mounts and sole to prevent water from entering. Water in the screw holes will rust some screws and it will always swell and weaken the leather. A water swelled sole changes the alignment between the blade and the shoe. Sno-Seal® should be reapplied to the sole, especially around the blade mounts, every time you treat the upper, sole edges, or welt stitching.